Pro Stylists' Top Tricks for Curls That Last and Last
Curls can add polish, volume and a little bit of glamour to your everyday look. But for as much time as they can take to create — whether you opt for heatless curls or use a curling iron or wand — curls often fall flat pretty quickly, which can make the effort you put into doing your hair feel like a waste. Well, that’s hopefully a thing of the past starting now because the key to supreme curl staying power has everything to do with your technique, tools, hair products and even your styling prep. Here, three hairstylists offer their wisdom on how to make curls last longer and a few hacks on how to touch them up if they do happen to unfurl.
What causes curls to fall?
“There are various reasons why curls can fall out, from too much product to overheating or not allowing enough time for your curls to cool down,” says celebrity hairstylist Laura Polko, who has worked with Adriana Lima and Olivia Munn.
The environment is a factor, too. Syrenthia Qui?ones, licensed salon professional and senior manager of sales and education at Mane, points out that humidity can impact how long curls last. Wind doesn’t help either, and sometimes when hair is exposed to the elements outside, products just can’t provide the hold they’re supposed to, she adds.
Finally, your hair’s natural state can play a role in your curls’ longevity. “The duration of a curl staying intact is influenced by factors such as natural texture, length and thickness,” says Rogerio Cavalcante, hairstylist and owner of The Second Floor Salon in New York City. “Hair that is naturally straight and thick presents a greater difficulty in keeping curls in place. In essence, the straighter and thicker the hair, the more challenging it becomes to retain the desired curl.” Additionally, really long hair can cause curls to drop due to weight, so it might be time for a trim if you notice your coils drooping almost immediately after curling.
How to make curls last longer: 9 easy tips
Now, some good news for those who love curls: The right prep can go a long way in keeping your curls defined over the course of a day — or even days if you’re lucky. Think of your hair like a canvas for coils. The proper foundation makes all the difference, so you’ll want to follow a few steps as mapped out below before you pick up a curling iron or wand.

1. Prep hair with these products
Qui?ones recommends washing your hair using a shampoo and conditioner designed for your hair type, towel-drying after rinsing thoroughly and then applying either a curl-enhancer, like Hairitage Hydrating Curl Creme (Buy from Walmart, $10), styling cream or heat-protective styling product, all of which provide texture and extra hold.
2. Only curl hair when it's dry
“Hair should be clean and completely dry before curling your hair,” adds Polko. That’s because wet or damp hair won’t hold be able to form a long-lasting curl. Also, hair is more delicate when wet, so exposing it to the heat of a curling iron can be extra damaging.
Related: 5 Dyson Airwrap Dupes: Dry and Style Hair At The Same Time For $100s Less
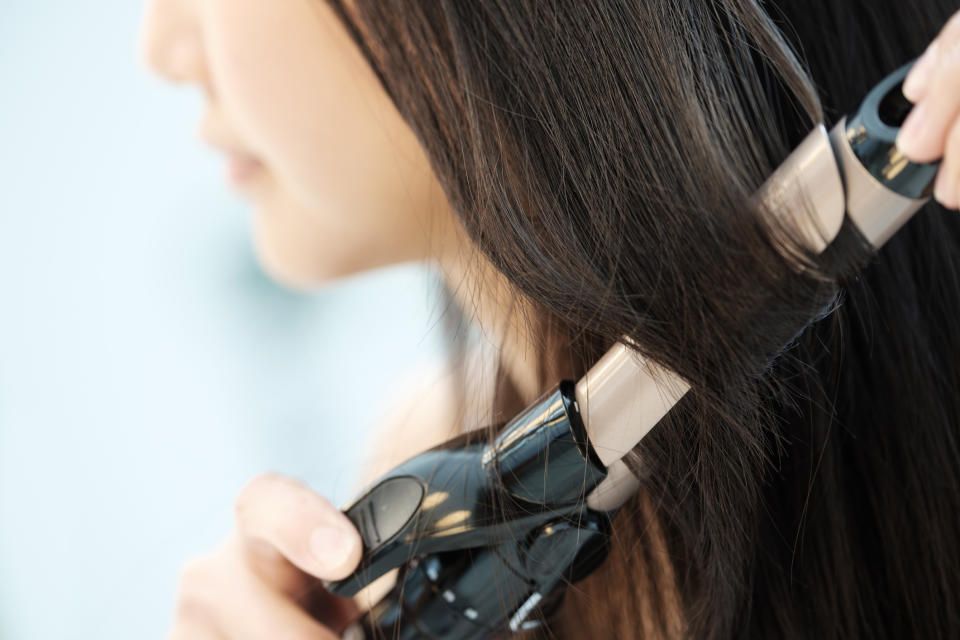
3. Choose a small-barrel curling iron
“Smaller barrels create tighter curls, which tend to hold their shape better,” says Qui?ones. And a standard 1-inch barrel will do the trick. Ones we like: Bed Head Curlipops 1'' Tourmaline + Ceramic Tapered Curling Wand (Buy from Ulta, $34.99) and Mane Let’s Bounce 1” Curling Wand (Buy from Mane, $98).
Hands get tired curling? Try an automatic 1” curling iron that does the work for you. Polko suggests InfinitiPRO by Conair Curl Secret (Buy from Amazon, $99.97) but for a more affordable option, try KISS Instawave 101 Automatic Curler (Buy from Amazon, $29.99).
Related: How To Curl Hair With a Straightener: It Sounds Crazy But It Works Like a Charm
4. Work in small sections

Polko says to divide the hair into sections no wider than 1 inch because “the smaller the section, the tighter the curls.” Just brush through hair to remove tangles, then clip up the top layer of hair and begin working in 1” sections on the hair that’s left unclipped.
5. Pay attention to technique
Your wrapping technique also matters, particularly if you aren’t using an auto-curler. “To achieve even curls, wrap smaller sections of hair around the wand, ensuring every strand makes contact,” says Cavalcante. “Avoid overlapping hair during wrapping, and distribute it evenly along the wand's length.”
For a tutorial, watch the below video from YouTuber Cynthia Dhimdis:
6. Set the tool’s temperature to *this*
Hot tool temperature plays a role in how your curls hold. In general, you can go a little bit hotter if you have thicker hair versus fine — but there’s definitely a thing as setting it too high. “Set the wand to a moderate temperature of 300 degrees [Fahrenheit] and hold onto the hair for a slightly extended duration — 12 to 18 seconds,” advises Cavalcante. “Many tools on the market reach up to an excessive 450 degrees, which is absurd and can damage hair easily. Maintaining your hair at a moderate temperature for a more extended period is key to prolonging the life of your curls and preventing damage.”
7. Let coils cool down
“It’s important to always give your curls adequate time to set before brushing through as this helps set the shape,” says Qui?ones. You also don’t want to excessively touch them either since the oils on fingers can loosen spirals as well.
8. Set with curlers for extra hold

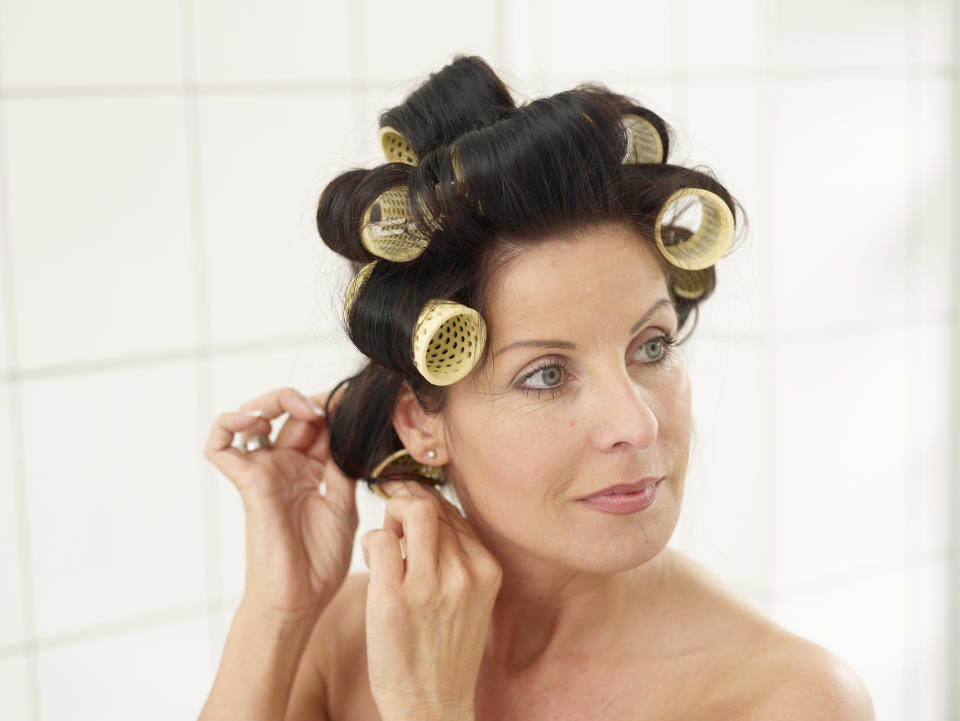
Want a little extra insurance, say, if you’re curling your hair and hoping it’ll last for an all-day activity or a special event in the evening? You can try a simple pinning hack to help them set. “For an added touch, consider rolling up sections of [curled] hair and securing them with rollers or hairpins,” says Cavalcante. “The longer you leave the hair rolled up, the more enduring the curls will be.” That’s because when your hair cools off pinned up, the cuticle (outer layer) stays pressed into the curl shape longer.
9. Lock curls in with hairspray
Whether you achieve your curls with a heatless technique or you whip out a wand, you’ll always want finish with some kind of a hairspray to keep them in place. A reliable hairspray, like Rahua’s Defining Hair Spray (Buy from Rahua, $37), will provide a strong and lasting hold, says Cavalcante. Another hairspray pros like Qui?ones favor is Big Sexy Hair Spray & Play Volumizing Hairspray (Buy from Ulta, $22.95).
How to quickly fix curls that have fallen
Even if you’ve found your ideal hair tool, curling technique and styling products, your curls may still fall. These quick fixes can help you revive your style in no time.
1. Carry a travel curling iron or wand
Consider adding a mini curling iron, like Travel Smart by Conair Ceramic Mini Curling Iron 1" (Buy from Amazon, $19.99), to your beauty arsenal for travel or use at the gym, and stick to the areas that need TLC the most. “Re-curling those sections can revive the shape and restore the curls,” says Qui?ones.
2. Use your fingers
“Wrap spirals around your finger and gently spray them with a curl-enhancing spray or hairspray to provide hold,” says Qui?ones.
3. Grab some bobby pins
“If you have bobby pins or hair clips, you can try pinning the fallen curls up to add volume and create a new style,” says Qui?ones. Of course, this won’t have quite as much of an impact as pinning fresh curls, at least when it comes to long-lasting hold.
4. Scrunch away
On the go, Cavalcante recommends using a texturizing hairspray and scrunching hair upward with fingers “to try to wake up the fallen curls.”
For more hair care tips and tricks, check out these stories:
This $9 Skin Care Tool Is Study-Proven to Help Hair Grow in Thicker and Lusher
Scalp Brush Benefits: How This Inexpensive Tool Can Help Regrow Thinning Hair
This Wavy Hair Routine Ensures Hair Looks Thick, Full and Bouncy Longer After Washing
