Guide to Floor Transition Strips
The Spruce / Ellen Lindner
Reviewed by Johnathan BrewerFact checked by Jessica Wrubel
In a perfect world, your flooring would flow seamlessly from room to room. Hardwood flooring, for example, would flow continuously from living room to bedroom to kitchen to bathroom.
In the real world, however, you cannot help but transition from one flooring type to another because different rooms need different types of flooring. For example, the Brazilian cherry works great in the living room, but you must transition to porcelain in the bathroom due to moisture issues. To accommodate these shifts from one type of flooring to another, the flooring industry uses several different types of accessory items called transition strips.
What is a Transition Strip?
Transition strips accommodate the transition from one type of flooring to another. You'll find them between rooms, for example where hardwood in a dining room transitions to tile in a kitchen.
Transitions Between Similar Floors
If you are transitioning from one type of flooring to the same type (e.g., ceramic to ceramic), it may be possible to have them meet without a transition strip, especially if they are the same thickness. But a transition usually is a better option. For one thing, seams are often incorporated between rooms of like materials to provide for expansion and contraction. A transition strip covers the expansion gap for each material. Also, unless the two floors happen to blend in an aesthetically pleasing way, you'll probably want the visual break provided by a transition.
Transitions Between Different Materials
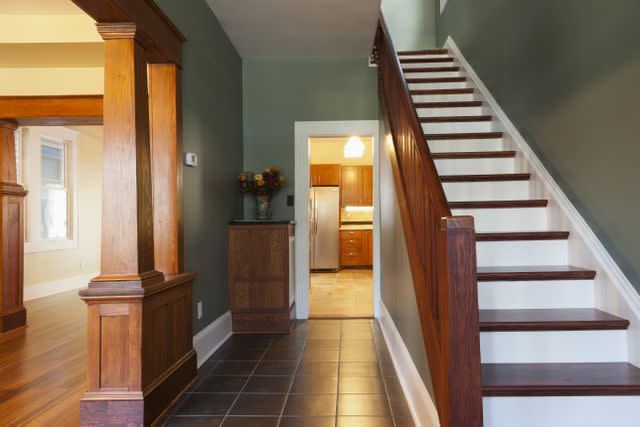
If you are dealing with two different types of floor coverings, a transition strip is almost always required. Each material needs some kind of finish along its edge, and different materials often create a change in floor height as well as changes in underfoot characteristics, for example, soft carpet transitioning to harder tile.
You may think that the less noticeable a transition is the better, but usually that is not the case. Clearly visible transitions are safer because the person walking toward them can see and anticipate the change in flooring elevation or feel, and this helps to prevent accidents. This is particularly helpful in an area where you have floors of different heights or where floors have a large gap between them. The transition strip between different heights is called a reducer, and it will create a smoother transition and help avoid tripping hazards.
While transition strips used to be almost exclusively aluminum, you can now purchase a variety of genuine hardwood transitions, even if the floors you are connecting are not wood. For laminate flooring, for example, you can purchase hardwood transition strips that look just like your laminate.
Full Saddle and Half Saddle Transitions
A more custom way to connect different floors is with saddle transitions—they are wider than transition strips, sit on top of both floors, and lay flat on the subfloor when installed. Saddle transitions are more expensive than transition strips, but they are longer-lasting and come in a wide range of high-quality materials like wood and stone. There are full and half saddle transitions. A full saddle transition bridges two floors that are at the same level while a half-saddle transition bridges two different floor levels. A common application for saddle transitions is connecting wood and tile floors.
Carpet to Tile Transition
The Spruce / Margot Cavin
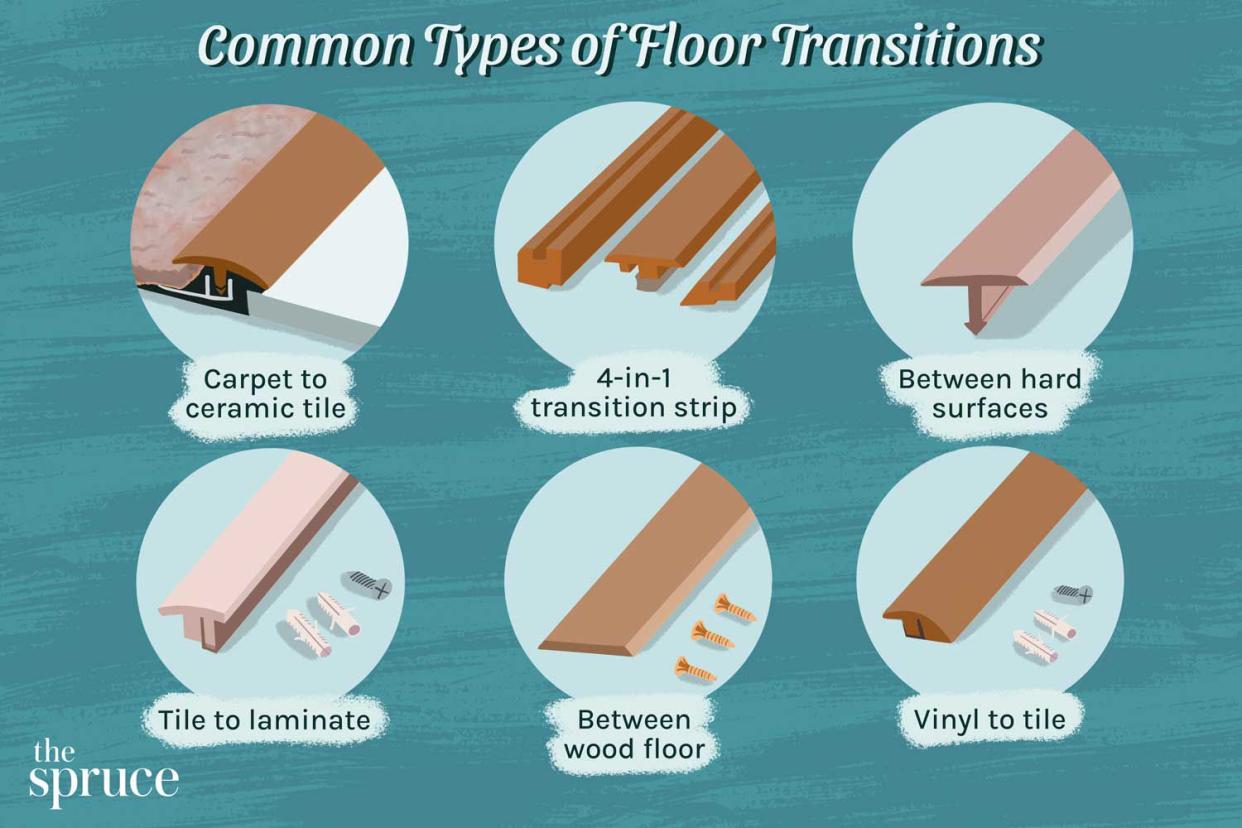
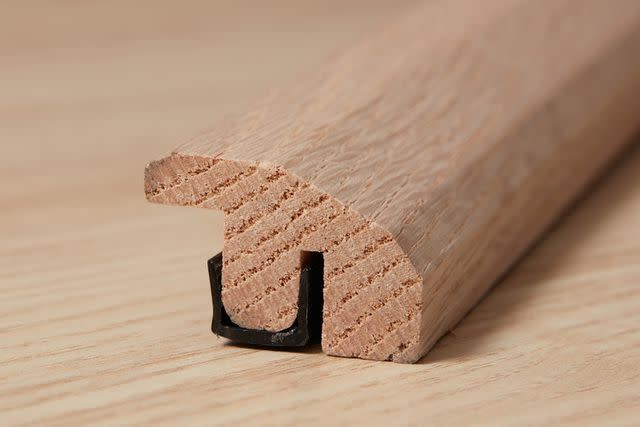
This transition strip is designed to join a low-pile carpet with a ceramic tile floor. This style makes use of an invisible aluminum strip tucked under the edge of the carpet, with upward-protruding spikes that grip the carpet. The adjoining ceramic tile butts up against this aluminum track but does not attach to it. Finally, a vinyl transition strip is snapped into a track in the aluminum strip, bridging both floors and covering the edges. Typically, this is 2" wide.
4-In-1 Transition Strip
The Spruce / Margot Cavin
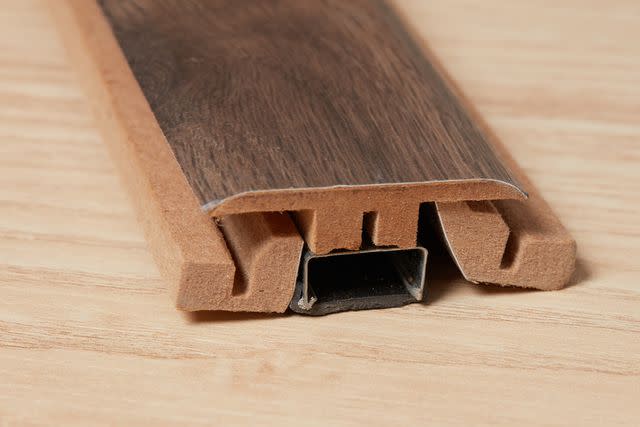
A 4-in-1 transition strip is the Swiss Army Knife type of transition strip, with interchangeable parts that work for different types of floors. A typical 4-in-1 transition includes a metal channel for mounting the system, with a T-molding, which fits into the channel and is used alone if you are joining floors that are the same height. For other situations, different pieces are used in conjunction with the T-molding:
Carpet Strip: Transition from carpet to another material.
Hard Surface Reducer: Transition from a thick hard flooring (such as hardwood or tile) to a thinner hard flooring, such as vinyl.
End Molding: Create a final finished edge on one floor material, rather than transitioning between two floors.
4-in-1 Transition Strip Uses
If you need a versatile solution, you can use a 4-in-1 transition strip in four different ways: T-molding, carpet strip, hard surface reducer, and end molding. T-molding joins floors with the same height; carpet strips transition carpet to any floor; a hard surface reducer minimizes thick-to-thin floors; and end molding creates a finished edge.
T-Strip for Hard Surfaces
The Spruce / Margot Cavin
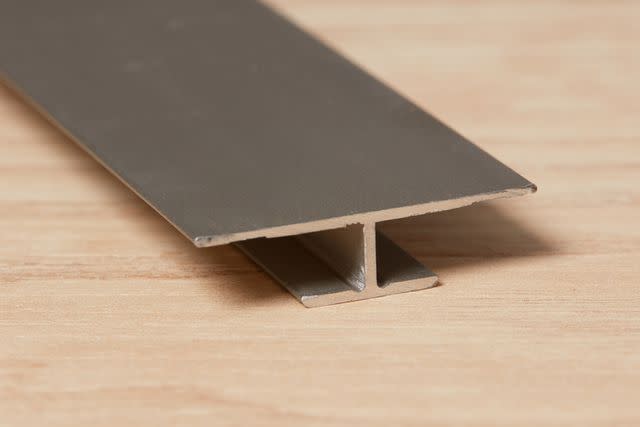
This T-shaped aluminum transition strip will work to link any two hard-surface floors of the same height. Installation involves filling the joint between floors with a special sealant, then forcing the vertical portion of the T down into the gap, where it bonds with the sealant. The top reveal area of the T fits snug against the surface of the flooring—tighter than with any other type of transition strip.
Although these transition strips are available in several colors, it may be hard to find an aesthetic match that looks good with both floors. These are between 2 inches and 5 inches, often leaning towards the larger end.
Matching Two Floor Colors With a T-Strip
If you’re using a T-strip to transition two floors that vary widely in color, it may be hard to find a match that will look good with both floors. Try to find the closest match to one of the floor’s colors to look the most seamless, otherwise, use a neutral material in the middle.
Tile-to-Laminate Transition
The Spruce / Margot Cavin
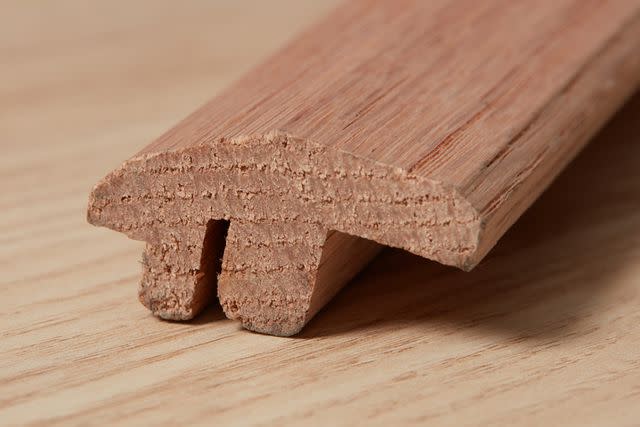
This transition strip is designed for joining a laminate floor to a tile floor. The hardwood strip is usually about 2 inches wide, unfinished, and can be stained to match the color of the laminate flooring. Ceramic tile floors tend to be higher than laminate floors because tile is installed over cement board, while laminate usually lies over a thin foam underlayment. This transition strip features molding with offset grooves to match the differing thicknesses of the flooring.
Installation involves mounting a metal channel with expandable anchors embedded in the subfloor between floors, then snapping the finish molding into place over the surface flooring.
Wood-to-Wood Seam Binder
The Spruce / Margot Cavin
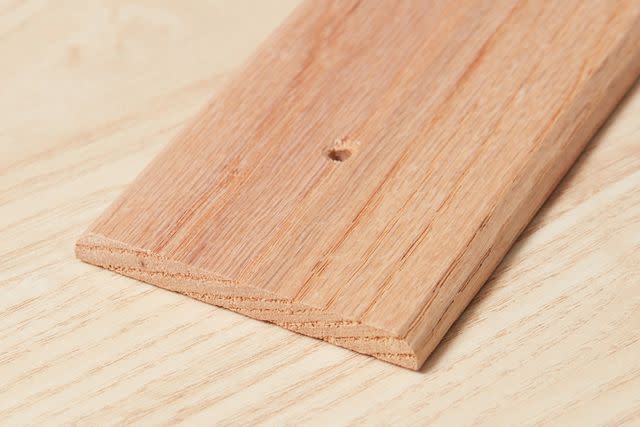
Usually called seam binders, these wide (about 5 inches) transition strips are flat strips of hardwood with beveled edges, used to bridge two wood floors of equal heights. A seam binder is installed by simply positioning the strip over the seam, then driving screws through pre-drilled pilot holes in the strip to secure it to the subfloor in the gap between the floors. Because it is attached to neither floor, each floor can expand and contract without cracking the transition strip.
Seam binders are available in different widths. Most are sold unfinished, so you can stain them to match your flooring.
Tip
Wood transition strips are easy to customize, and any damage can be hidden or fixed through filling, sanding, and staining.
Vinyl to Tile Transition
The Spruce / Margot Cavin
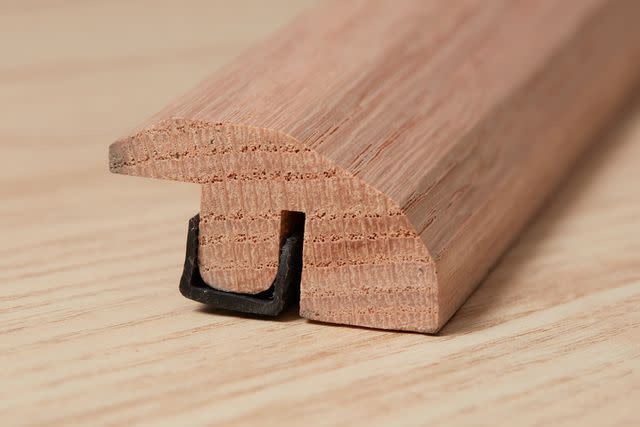
This hardwood transition strip is shaped to make a smooth transition from a lower vinyl floor upward to a thicker ceramic or stone tile floor. In almost every case, vinyl will be lower than laminate. These are usually 2 inches to 5 inches wide.
Installation involves anchoring a metal channel to the subfloor using screws and expansion anchors, then snapping the top strip into the channel to cover the seam between floors. The hardwood strip is left unfinished, so you can stain or paint it to match your flooring.
Carpet Edge Gripper
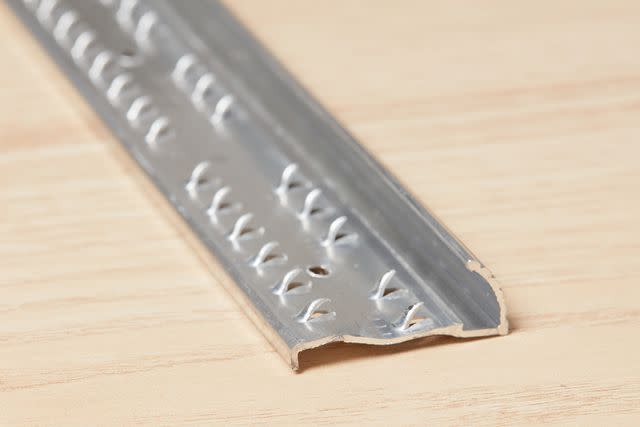
The Spruce / Margot Cavin
A carpet edge gripper is an aluminum strip that holds the edge of the carpet with sharp metal teeth. It is used to transition to any adjoining surface that lies lower than the carpet.
An edge gripper is installed by being tacked to the subfloor. Then, the carpet is forced into the toothed side of the strip, which holds the carpet backing in the same way that tackless strips are used to secure a carpet around the perimeter of the room.
Frequently Asked Questions
When should you use a transition strip?
If the flooring is going from carpet to tile, tile to wood flooring, etc., you should use a transition strip to help join the two different floorings together and make a safer transition.
Should you put transition strips in doorways?
There is no need to put transition strips in the doorways of each room if the same flooring is being used in the rooms. However, if there is a transition, like a hardwood bedroom to a tile bathroom, you should put a transition strip in the doorway.
How do you install floor transition strips?
Not all types of transition strips are installed the same. Some snap in place, others are glued down, while a few need to be screwed down or are attached with teeth. But, typically, you'll prepare your subfloor, then cut the transition strip and the mounting rail or channel, attach it to the subfloor, and then attach the transition strip.
When are floor transition strips installed?
Floor transition strips are installed when there are two different types of flooring coming together, for example, hardwood and tile or vinyl plank and carpet. These are installed before baseboards and at the same time as the other flooring.
What are the alternatives to transition strips?
As an alternative to transition strips, you can use a seam binder when the floors are roughly the same height. You could also use an alternative material, like marble.
Read the original article on The Spruce.
