Everything You Need to Know About Gel Nail Extensions

After a year of DIY everything, many people have been racing back to their salons for some professional pampering. (My first appointment? Lash extensions. Heck, I missed them so much during quarantine that I tried drawing in fake lashes with eyeliner.)
If your first order of business was getting back to your manicurist for a fresh set of tips, you may want to read on because we’re about to do a deep dive into gel nail extensions and how they’re different from—and perhaps even superior to—other types of manicures.
What are gel nail extensions?
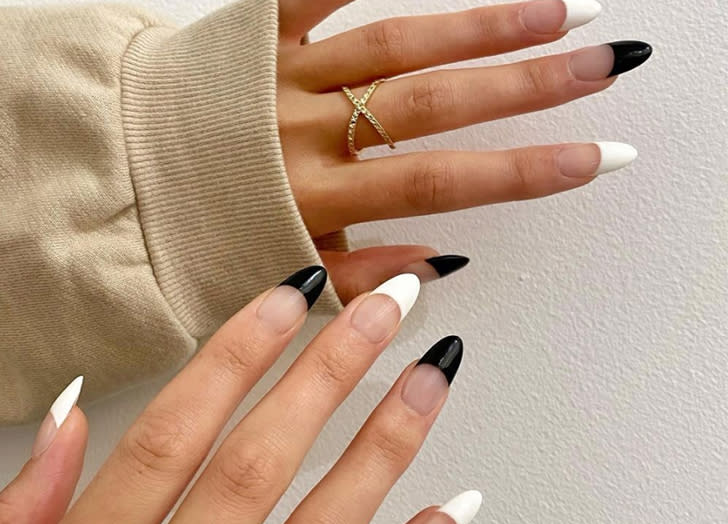
Gel nail extensions are either built directly onto your nails using a hard gel formula and cured with a UV or LED light—or they come pre-packaged and pre-shaped (like press on nails but instead of using glue to secure them in place, they’re set with gel).
The latter option has gained more popularity in recent years because of how easy they are to apply and remove. (They also come in all sorts of trendy shapes from almond to stiletto and even coffin tips.) In fact, you may have come across brands like Apres Gel X or Kiara Sky Gelly Tips during one of your #nailart Instagram holes.
What’s the difference between gel extensions and acrylic tips?
Though the two types of tips may look similar at a glance, there is a big difference in the way they’re applied and set in place. If you’ve ever had acrylic nails before, you may have noticed your manicurist using a powder and a liquid combo to mold your faux tips to their desired shape and length. Acrylics are also air-dried.
Gel extensions, on the other (ahem) hand, involve just the gel itself (which comes in a small pot and has a viscous, honey-like texture) and a UV or LED light for curing them.
What are the benefits of gel nail extensions?
The first thing gels have over acrylics is that both the application and removal process itself is faster. As you may know from past experience, getting acrylics put on is no easy feat; it involves a lot of dust and powder and drilling (and the same goes for the removal). Gel extensions—especially the pre-packaged kind, which are often made of a soft gel, involve a little filing and good acetone soak to lift them off. And though the built-on gel extensions are heartier and will require more extensive filing before soaking, it’s not as intense a process as with acrylics.
Gel extensions may also be a better option for you if you’re sensitive to scent, as they don’t give off any strong fumes or use strong chemicals like methyl methacrylate and toluene (which are commonly found in acrylics). And they tend to look more natural and feel lighter on your nails.
What are the downsides of gel nail extensions?
As with any type of nail extension, improper handling can damage or weaken your natural nails. That said, with careful application, removal and maintenance (all of which we’ll get into more detail below), they are considered a safe way to enhance your tips.
How are they applied?
Whether you’re getting pre-shaped extensions put on or having them built directly onto your nails, your manicurist will start by filing, buffing and cleaning off your natural nails. Next, they will either place a form underneath your nail to create the added length and shape, layer by layer, allowing them to dry under the UV light in-between steps—or they will simply adhere the pre-shaped extensions to your nails using the bonder, primer and gel that come with the kit.
The rest of your appointment will be like a regular gel manicure. The extensions will be painted over with a standard gel polish and cured as usual. If you want some fun nail art to go with your new tips, your nail technician will paint on your desired designs before sealing everything off with a gel top coat and setting them under the light to cure.
How are they removed?
Again, depending on whether you had gel extensions built onto your nails or placed over them, the removal process will be slightly different. In the case of the former, your technician will file down the top layers of the gel extensions before wrapping your nails in acetone and foil to soak off the rest. After 15 or so minutes, they will gently push of any remaining gel and buff your natural nails to finish. The pre-shaped gel extensions are typically made of a softer gel and thus involve a gentler removal process, as they are don’t require as much filing before the soak.
How long do they last?
When applied correctly, gel nail extensions should last anywhere between 2 to 4 weeks (though most manicurists we’ve spoken to don’t recommend going beyond three weeks between fills).
Still, it’s important to note that since everyone’s nails grow at different rates, these markers are merely meant to serve as a guide.
The main thing you want to keep an eye on is how far out the extensions are growing beyond your nail beds, as that’s typically where you can run into issues like snagging or breaking them, thereby damaging your natural nails in the process. Not to mention that by that point, you can clearly see where the nails have grown out.
And since we’re on the topic, here’s a final tip: Please don’t pick or peel at your gel extensions as they grow out. This is the number one cause of damage for most people because you could inadvertently end up taking off the top layers of your natural nail with the gels.
RELATED: The 5 Best Press On Nails to Try Now (And How to Apply Them So They Fit Better)
