The Best Way to Fry Eggs (I Tested 8 Methods!)
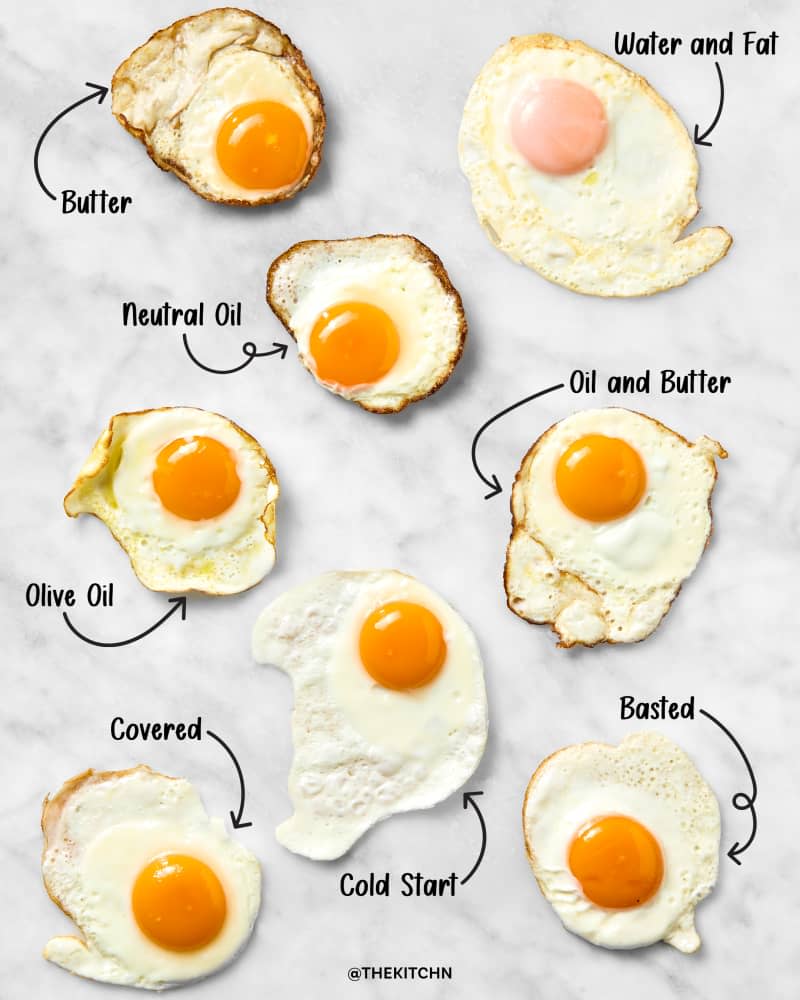
Table of Contents
Fried eggs are a quintessential breakfast classic. They’re just as comfortable on a fancy brunch menu as they are in a greasy spoon diner. And while it’s pretty easy to make at home, it’s also one of the more difficult things to get exactly right. That’s because you can fry an egg a number of ways, and people have strong preferences about how they’re prepared. Some people like their eggs over-medium, or with browned lacy edges; others prefer a more gentle cook.
But, for me, the “best” fried egg is really the easiest fried egg. It doesn’t stick to the pan, it doesn’t make a mess, and cooking it doesn’t smoke out the kitchen. And, of course, the whites are properly cooked through (which can be one of the trickiest parts!) To nail down the best way to fry an egg, I researched and tested eight popular cooking methods at home.
The best way to fry eggs is with water and fat in a covered pan. It delivers an egg with well-set whites, a jammy yolk, and a bit of browning on the edges.
A Few Notes on Methodology
For something that seems so simple, frying an egg can be a finicky task. There are a surprising number of factors to consider — heat level, cooking vessel, whether or not to flip, and the list goes on, but suffice it to say I had to establish some parameters before I got started.
The eggs: I used large eggs for this test. I cracked the eggs into a small bowl before frying to minimize the possibility of any shells making their way into the skillet. I used 1 large egg per method to avoid multiple eggs running into one another in the pan. I also tried to pour them in the center of the pan, where they would get the most even heat.
The pan: All of the eggs were cooked in a 10-inch nonstick skillet. Although some people swear by frying eggs in a cast-iron pan or even stainless steel, my goal was the easiest fried egg, not the most classic. I wanted to keep the yolk intact and avoid scraping stuck-on egg from the bottom of the pan.
To flip or not to flip: I was looking for a gently cooked sunny-side up egg, which meant no flipping. Flipping the egg is a good method for a more well-cooked yolk, but I wanted an egg with just-set whites and a runny yolk ready for a piece of toast to dunk in.
The testing: I tested all eight methods on the same day with eggs from the same carton. All of the eggs were cooked in the same 10-inch nonstick skillet, which was preheated for 2 minutes over medium heat (with the exception in the case of the cold-start method). I let the pan cool completely and washed it between each test. I tasted each egg just after cooking to judge the flavor.
Ratings: I rated the eggs on a scale of 1 to 10, with 10 being an evenly cooked, flavorful egg with set whites, a runny yolk, and minimal browning around the edges.
Fried Egg Method: Cold Start
Rating: 3/10
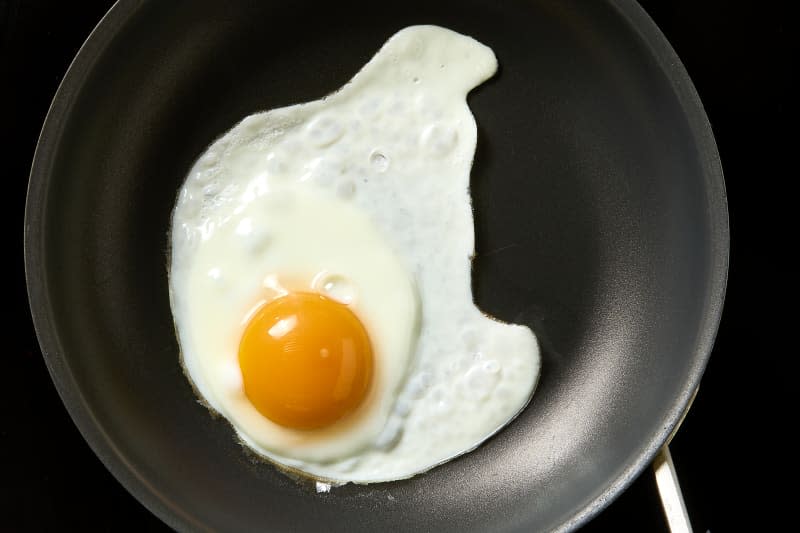
About this method: This cooking method is as simple as it gets. The egg is poured into a cold, empty nonstick skillet — no oil or butter at all — and then cooked over medium heat until the whites are just set.
Results: The upside to the cold start is that the eggs cooked pretty gently and had almost no browned edges. There’s no extra fat in the pan to spatter out, which is nice for clean up and safety. The downside is that without any fat in the pan, the egg tasted noticeably less rich and delicious than other fried eggs in the lineup. It also took just about 6 minutes to cook, which is much longer than other methods (boo).
Fried Egg Method: Neutral Oil
Rating: 5/10
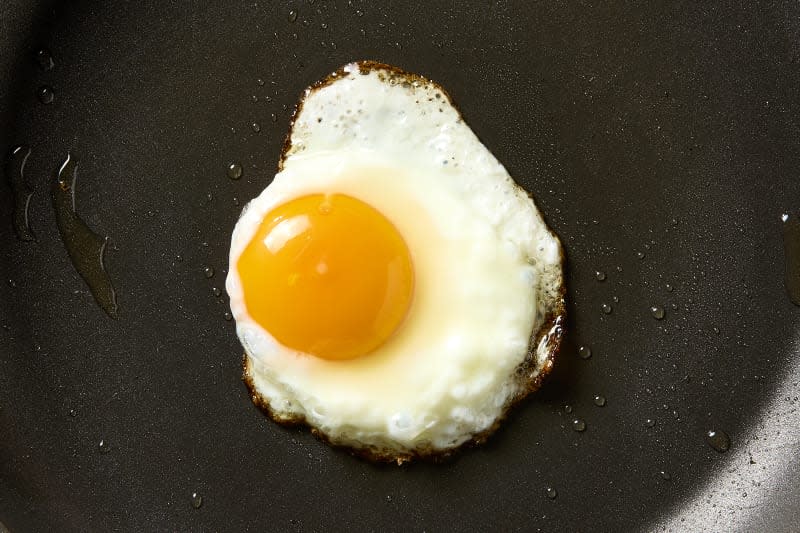
About this method: For this tried-and-true method, I cooked one egg in 1 teaspoon of vegetable oil in an uncovered pan that had been preheated for 2 minutes over medium heat.
Results: This method produced what I would consider a good, standard fried egg. There was a bit of oil splatter while it was cooking, but not too much. Cooking the egg uncovered meant it needed longer in the pan for the whites to fully cook, clocking in at about 3 1/2 minutes. The finished egg was browned around the edges because of that extra cooking time, which was not what I was after. Vegetable oil didn’t add much in the way of flavor, so while the egg itself was cooked fine, it was nothing to write home about.
Fried Egg Method: Oil + Butter
Rating: 5/10
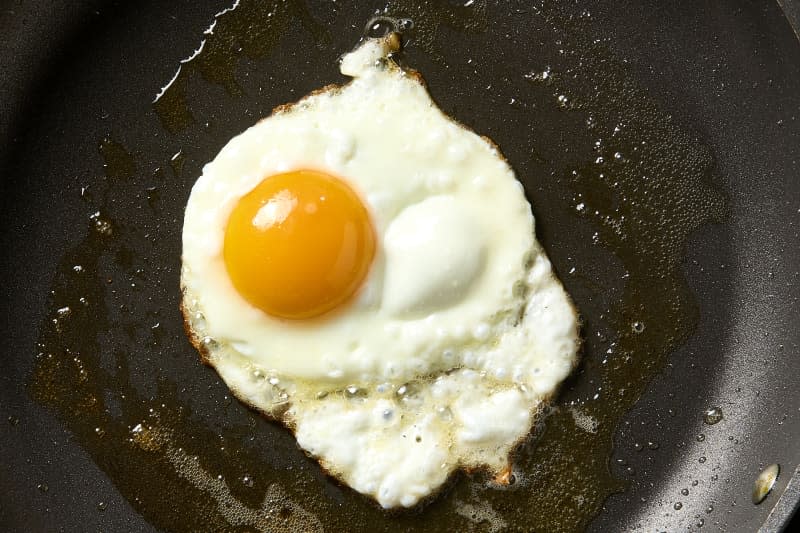
About this method: I preheated the pan for 2 minutes with 1 teaspoon of vegetable oil, then added 1 teaspoon of butter to the hot pan just before slipping in the egg. I covered the pan with a lid and cooked the egg for 1 minute, then turned the heat off and let it finish cooking, covered for an additional 30 seconds.
Results: This is a bit of a maximalist method for frying eggs. The idea is that the addition of two fats makes for a richer, fuller flavor than just using one alone. As promised, the egg did have a richer flavor than ones cooked in just one type of fat. White it yielded a perfect runny yolk and well-set whites, the egg had a harder cook on the bottom with a crispier texture. In the end, the extra bit of richness wasn’t worth the effort.
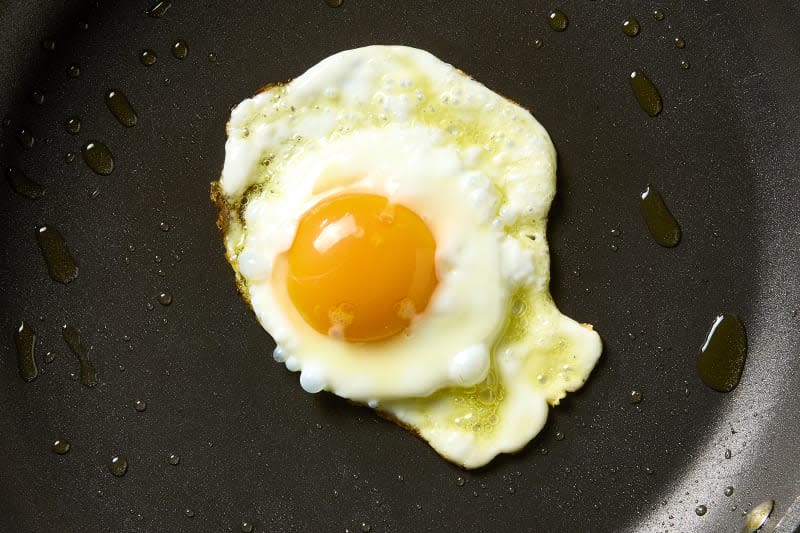
Fried Egg Method: Olive Oil
Rating: 6/10
About this method: This is a simple twist on a classic preparation. It’s the same as the vegetable oil test above: The eggs are cooked uncovered in a pan that has been preheated for 2 minutes with 1 teaspoon of olive oil instead.
Results: Compared with methods that use butter or vegetable oil, this one fared the best in terms of browning. I was specifically aiming for eggs without browned bottoms and edges, and the olive oil delivered the egg with the least of those. In terms of flavor it landed right in the middle, having more flavor than the vegetable oil — which didn’t add much at all — but less than butter.
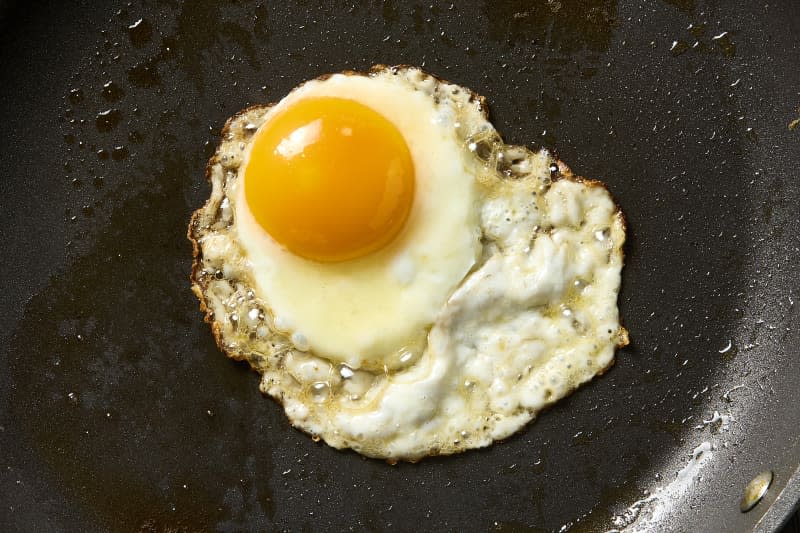
Fried Egg Method: Butter
Rating: 7/10
About this method: I preheated a pan with 1 teaspoon of butter for 2 minutes, then added the egg and fried it, uncovered, until the whites were just set.
Results: While this method gets high marks for flavor (browned butter, yum), it loses points for excessive browning. Two things were working against my goal of a gently cooked egg: the lack of a lid, and the butter itself. Without a cover to trap the heat, I had to fry the egg for slightly longer to set the whites, which in turn led to the bottom and edges of the egg getting much crispier than I wanted. As the egg cooked, the butter in the pan browned, which while delicious, contributed to the overall brown appearance of the finished egg. Tasty, but not what I wanted.
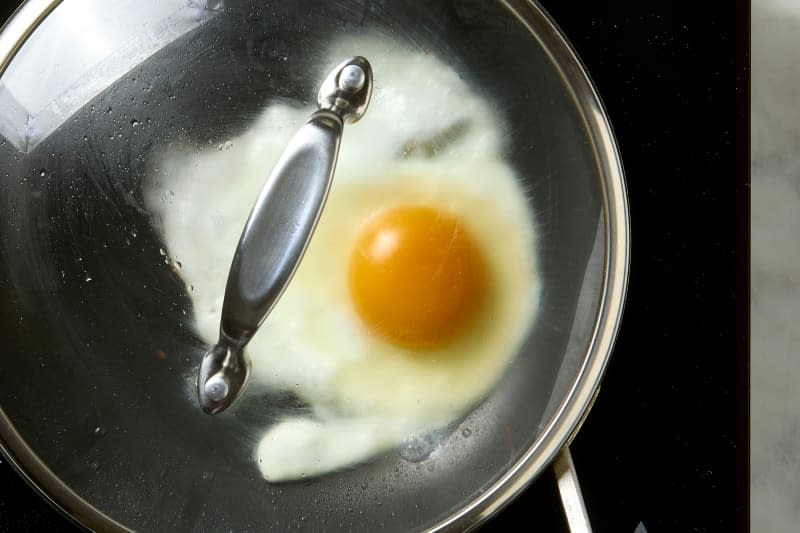
Fried Egg Method: Covered
Rating: 8/10
About this method: This method was identical to the butter test, but with a lid. I put 1 teaspoon of butter into the pan and preheated it for 2 minutes over medium heat, then added the egg and immediately covered the pan with a lid. I then cooked the egg until the whites were just set.
Results: This was pretty close to my ideal fried egg. It had the best of both worlds: the flavor of butter, and the gentler cook that comes from covering the pan. The browning on the bottom and around the edges was minimal. A covered pan traps heat all around the egg, so it cooks faster and more evenly than if it were uncovered.
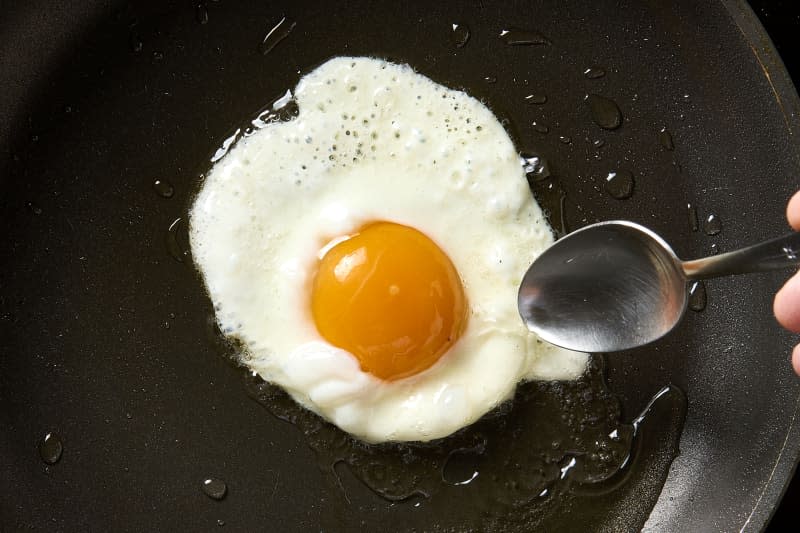
Fried Egg Method: Basted
Rating: 9/10
About this method: This method is a bit more hands on than the others. I added 2 tablespoons of butter to the pan and preheated it for 2 minutes over medium heat. I then added an egg to the pan, let it fry for about 1 minute, then tilted the pan and used a spoon to baste the top of the egg with melted butter until the whites were set.
Results: This is by far the chef-iest way to fry an egg of all the methods I tried. Searching ‘how to fry an egg’ returns many results with videos of chefs lovingly drizzling hot butter over a perfectly cooked egg, and for good reason — this egg was almost perfect.
The egg spent over half of its cooking time tilted away from the direct heat of the flame, so it actually cooked more gently than most of the other methods I tested. Additionally, cooking it this way allowed me the greatest amount of control. I could push the egg around in the pan, in and out of its butter bath, as well as specifically directing where on the egg’s surface to add more hot butter, thereby eliminating any spots being under or overcooked. The bottom of the egg was cooked, but not browned; there was nary a crispy edge to be seen; and since it was positively drowning in butter, it was delicious, if a bit rich. I wound up with the gently cooked butter-drenched fried egg of my dreams, but at what cost?
While this produced the best egg, it was also by far the most high-maintenance one. Basting an egg is much more active than simply frying it, on top of which, you’re tilting a pan full of very hot fat toward yourself, which is not exactly the height of safety. Since I opted for a nonstick pan, I also had to use a nonmetal spoon for basting, since you should never use metal utensils on nonstick cookware. Luckily, I had a favorite silicone spoon handy, but not everyone does. All in all, while this was a top-notch fried egg, this method would never be my go-to for making an easy fried egg.
Fried Egg Method: Water + Fat
Rating: 10/10
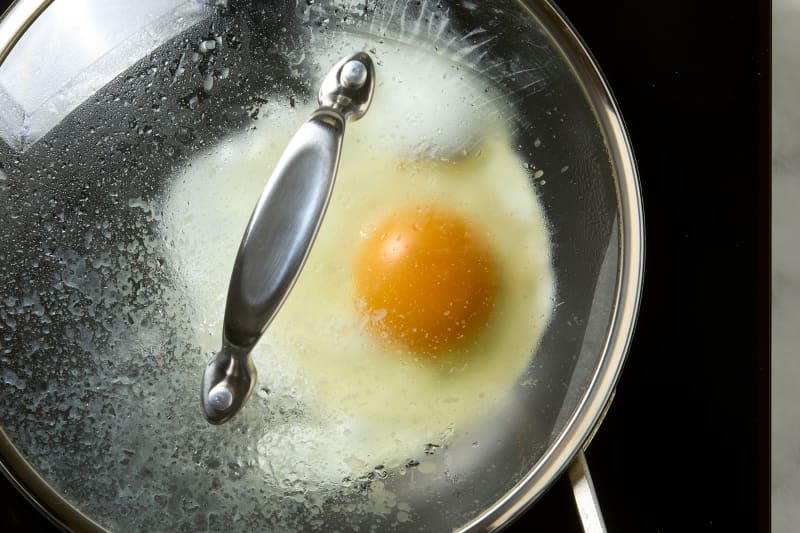
About this method: This method is identical to the covered method above, but with the addition of 1 teaspoon of water. I added the water just after adding the egg to the preheated pan and quickly covered it with a lid. I then fried the egg over medium heat for about 1 minute, until the whites were just set.
Results: Nailed it! This method delivers the best fried egg. Covering the pan leads to more even cooking, and coupling it with water takes it to the next level. The steam created by adding just 1 teaspoon of water is enough to create the perfect environment for gentle, even egg cooking.
Butter adds great flavor without becoming overly rich like the basted egg. The whites were well set, and the yolk was jammy, not overly runny, but cooked just enough for a toast dunk. There was a bit of browning on the edges, but very little and the bottom of the egg remained silky with no crisping up. Mission accomplished.
Tips for Success
For the record, there were no bad eggs here. A fried egg is pretty hard to totally screw up, and I would have happily put every egg I cooked on top of a bowl of fried rice. I did learn a few lessons though that may help you the next time you’re frying an egg at home.
If you’re going for a gently cooked sunny-side up egg, cover the pan. Any method where the egg is uncovered is ultimately going to lead to browned edges and a harder cooked bottom. You simply need to cook the egg for longer to get the whites fully set, and since the heat is only coming from the bottom of the pan and also is escaping from the top, there’s no way to totally avoid browning.
Flipping the egg ensures the whites are cooked faster. But then you’re sacrificing the sunny-side up of it all. Again, a lid is your friend.
If you have one, use a glass lid. Glass lets you monitor your eggs without releasing the trapped heat so they don’t become overcooked.
We recommend a nonstick skillet for frying eggs. Plenty of people hail the steel skillet as the best way to get a crisp fried egg. Unfortunately, to keep eggs from sticking in a steel pan, it’s going to need to be ripping hot, which will create smoke. If you’re a confident cook with a good hood vent, go for it. For the rest of us, the slick coating on a nonstick skillet lets you slide the finished egg right onto your plate with little-to-no sticking. You can use any skillet you have, but a nonstick one is your best chance for brunch-quality, unbroken yolks. A well-seasoned cast-iron pan can also work, but save your steel skillet for getting a good sear on a steak.
